Guide to Install WordPress on a VPS (Beginner to Production – 2026)
and stronger security compared to shared hosting. In 2026, many developers, bloggers, and businesses
prefer VPS hosting to avoid limitations such as slow speed, restricted configurations, and shared resources.
This guide explains how to install WordPress on a VPS step by step in a clear and beginner-friendly way.
Whether you are setting up a personal blog, a portfolio website, or a production-ready business site,
this guide will help you understand the complete WordPress VPS installation process.
What Is a VPS and Why Use It for WordPress?
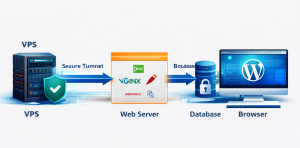
A VPS is a virtualized server that provides dedicated resources such as CPU, RAM, and storage.
Unlike shared hosting, where multiple websites compete for the same resources, a VPS ensures
consistent performance and greater stability.
Using WordPress on a VPS allows you to customize server settings, install required software versions,
improve page speed, and enhance security. This makes VPS hosting ideal for growing websites and
developers who want flexibility and scalability.
Minimum Requirements to Install WordPress on a VPS
Before starting the installation, ensure that your VPS meets the minimum requirements for WordPress.
Most VPS providers offer Linux-based servers, and Ubuntu is the most commonly used operating system.
- Ubuntu 20.04 or 22.04 VPS
- At least 1 GB RAM (2 GB recommended)
- 20 GB SSD storage
- Root or sudo access
- A registered domain name (optional but recommended)
Step 1: Update Your VPS Server
Once you connect to your VPS using SSH, the first step is to update the system packages.
Keeping your server updated helps prevent security vulnerabilities and compatibility issues.
Updating the server ensures that all installed software is running the latest stable versions.
Step 2: Install a Web Server (Nginx or Apache)
WordPress requires a web server to handle HTTP requests. The two most popular options are
Apache and Nginx. Apache is easier for beginners, while Nginx offers better performance
and lower memory usage.
In 2026, Nginx is widely recommended for WordPress VPS setups due to its speed and efficiency.
However, Apache remains a solid choice for those who prefer simplicity.
Step 3: Install PHP and Required Extensions
WordPress is built using PHP, so installing the correct PHP version is essential.
Modern WordPress installations work best with PHP 8.x.
Along with PHP, you must install common extensions such as MySQL support, XML handling,
image processing, and multibyte string support.
These extensions ensure WordPress plugins and themes function correctly.
Step 4: Install and Configure MySQL or MariaDB
WordPress uses a database to store posts, pages, user data, and settings.
MySQL or MariaDB is required to handle this data.
After installing the database server, create a new database and a dedicated database user.
Assign proper permissions to ensure WordPress can securely access the database.
Step 5: Download and Set Up WordPress
Once the server environment is ready, download the latest version of WordPress
from the official website and extract it into your web server directory.
Rename the configuration file and update it with your database name,
username, password, and host details.
This file acts as the bridge between WordPress and your database.
Step 6: Configure Web Server Virtual Host
A virtual host configuration allows your VPS to serve WordPress using your domain name.
This step ensures that requests to your domain are routed to the correct WordPress directory.
Proper virtual host configuration improves SEO, security, and performance.
It also makes it easier to host multiple websites on the same VPS.
Step 7: Set File Permissions and Ownership
File permissions play a critical role in WordPress security.
Incorrect permissions can allow attackers to modify files or inject malicious code.
Assign correct ownership to WordPress files and limit write access only where necessary.
This helps protect your website from unauthorized changes.
Step 8: Complete WordPress Installation via Browser
After server-side configuration, open your domain or VPS IP address in a browser.
You will see the WordPress installation screen.
Enter your site title, admin username, password, and email address.
Once completed, WordPress will finalize the setup and redirect you to the admin dashboard.
Step 9: Secure Your WordPress VPS
Security is a major reason developers choose VPS hosting.
After installation, you should immediately secure your server and WordPress site.
- Enable a firewall
- Disable root login via SSH
- Use strong passwords
- Install a WordPress security plugin
- Keep WordPress core, themes, and plugins updated
Step 10: Enable HTTPS for WordPress
HTTPS is mandatory for SEO, user trust, and data security.
You can enable HTTPS using a free SSL certificate or a CDN-based solution.
Once HTTPS is enabled, update WordPress settings to use the secure URL.
This prevents mixed content warnings and improves search engine rankings.
Common Mistakes to Avoid
Beginners often make mistakes that can affect performance or security.
Avoid using outdated PHP versions, weak database credentials,
incorrect file permissions, and unsecured admin accounts.
Regular backups and monitoring are essential to keep your WordPress VPS stable.
WordPress on VPS vs Shared Hosting
Shared hosting is cheaper and easier to set up, but it lacks flexibility.
VPS hosting provides better speed, security, and scalability.
If your website is growing or requires custom configurations,
a VPS is a long-term investment that delivers better results.
Conclusion
Installing WordPress on a VPS in 2026 is a smart choice for developers and website owners
who want control, performance, and security.
While the setup process involves more steps than shared hosting,
the benefits far outweigh the effort.
By following this guide, you can confidently deploy WordPress on a VPS
and build a fast, secure, and scalable website ready for future growth.